I have recently been on the lookout for a way to automate the process by which my Docker containers are pushed to Docker Hub.
In the past I would have used Travis or Azure Pipelines; however, GitHub made its Actions available some time ago, and I wanted to make use of this new feature.
I thought it would be worth sharing my experiences with this new GitHub feature and giving you some insights into how I used it to build and publish my containers.
What Are GitHub Actions
According to Github, Actions should automate your workflow from idea to production. Directly in your repository.
With GitHub Actions you can build end-to-end continuous integration (CI) and continuous deployment (CD) capabilities directly in your repository. GitHub Actions powers GitHub’s built-in continuous integration service.
You start start by creating a directory called .github/workflows in your project root. Inside that directory, you then create a YAML file. This file contains the job and the associated actions the build pipeline will execute to build and push the container.
Prepare VSCode for GitHub Actions
To make my life as a developer a bit easier, I use a bunch of plugins with VSCode. While a workflow is a YAML file, there is a Github Actions extension that enables Intellisense.
One of the most important rules of YAML is the indentation. Taps/spaces are sometimes hard to track; however, I found the perfect extension to help out with this indent rainbow.
To make it clear where in the workflow I’m currently working, I enabled the breadcrumbs functionality. This places breadcrumbs on the top of the file I am working in and allows me to monitor progress.
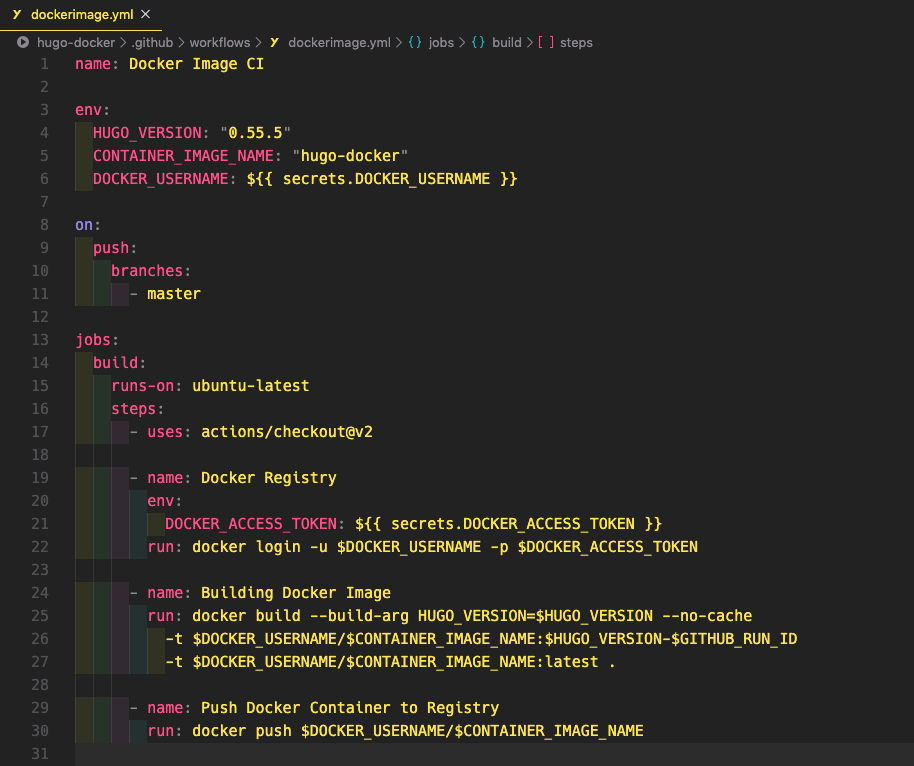
This will result in the following editor config:

Build a Workflow
Workflows are custom automated processes that you can set up in your repository to build, test, package, release, or deploy any code project on GitHub.
Workflows must have at least one job, and jobs contain a set of steps that perform individual tasks. Steps can run commands or use an action. You can create your own actions or use the actions that shared by members of the GitHub community and customize them as needed.
So what happens in the configuration file?
The first keyword name: defines the name of the workflow.
name: Docker Image CI

The second keyword env: defines a map with available variables in all jobs and steps in the workflow. If a variable name is defined more than once, Actions uses the most specific value. This will override an environment variable defined in a step.
env:
  HUGO_VERSION: "0.55.5"
  CONTAINER_IMAGE_NAME: "hugo-docker"
  DOCKER_USERNAME: ${{ secrets.DOCKER_USERNAME }}
The next keyword on: defines when the Action needs to run. In this case, I tell the Action to trigger every time I’m pushing the master branch to GitHub.
on:
  push:
    branches:
      - master
The keyword jobs: describes what should be executed in the workflow. You can define one or more jobs, depending on what you would like to execute. The jobs will run in parallel, unless you define a dependency with the needs keyword. The OS of each job is defined with the runs-on keyword.
jobs:
  build:
    runs-on: ubuntu-latest
    steps:
      - uses: actions/checkout@v2

      - name: Docker Registry
        env:
          DOCKER_ACCESS_TOKEN: ${{ secrets.DOCKER_ACCESS_TOKEN }}
        run: docker login -u $DOCKER_USERNAME -p $DOCKER_ACCESS_TOKEN

      - name: Building Docker Image
        run: docker build --build-arg HUGO_VERSION=$HUGO_VERSION --no-cache
          -t $DOCKER_USERNAME/$CONTAINER_IMAGE_NAME:$HUGO_VERSION-$GITHUB_RUN_ID
          -t $DOCKER_USERNAME/$CONTAINER_IMAGE_NAME:latest .

      - name: Push Docker Container to Registry
        run: docker push $DOCKER_USERNAME/$CONTAINER_IMAGE_NAME
If you put everything together and push it to GitHub you get the following in the Action GUI.

Using Secrets
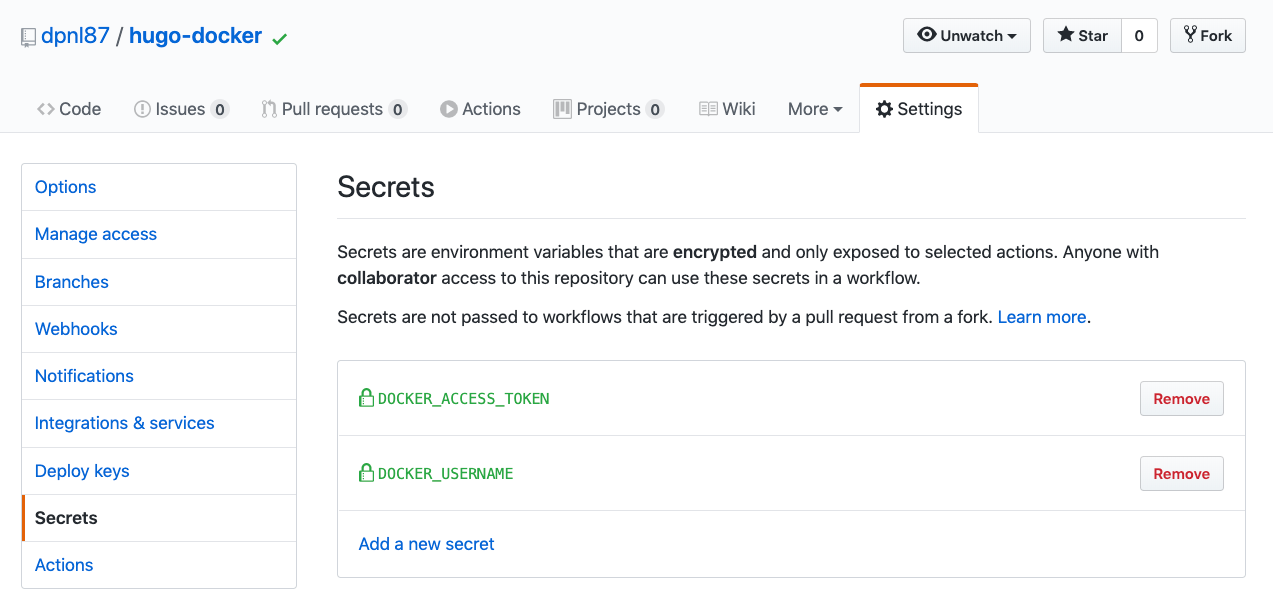
To provide an Action with a secret as an input or environment variable, you can use the secrets context to access any secrets you have stored in your repository.
These secrets are the “only” variables that will be made available in the container that is initiated with GitHub Actions.

Running it locally
To close the feedback loop and get faster feedback if the Action will work, I found Act. This function will run your GitHub Actions locally and expose the environment variables that GitHub provides.
This is a considerable benefit over using Azure Pipelines, which requires you to commit your file to verify if the test will succeed.
When you run act in your terminal it reads your GitHub Actions from .github/workflows/ and determines the set of actions that need to be run.

My Thoughts on GitHub Actions
I personally believe that GitHub Actions is a great alternative to the other CI tools I use regularly.
It is handy that the CI configuration and workflow result are within the repository. What’s more, Open Source projects can now show the build status directly within the project itself.
I will definitely use Github Actions for future projects. This was the first step in my plan to move my blog to Github and Open Source it.
Keep an eye out for details of a Hugo deployment workflow I employed in my next project.
If you have found this article useful, please consider recommending and sharing it with your friends.
If you have any questions or feedback, let me know on Twitter.